

A Complete Guide to Installing Luxury Vinyl Planks Over Hardwood Flooring in 2024
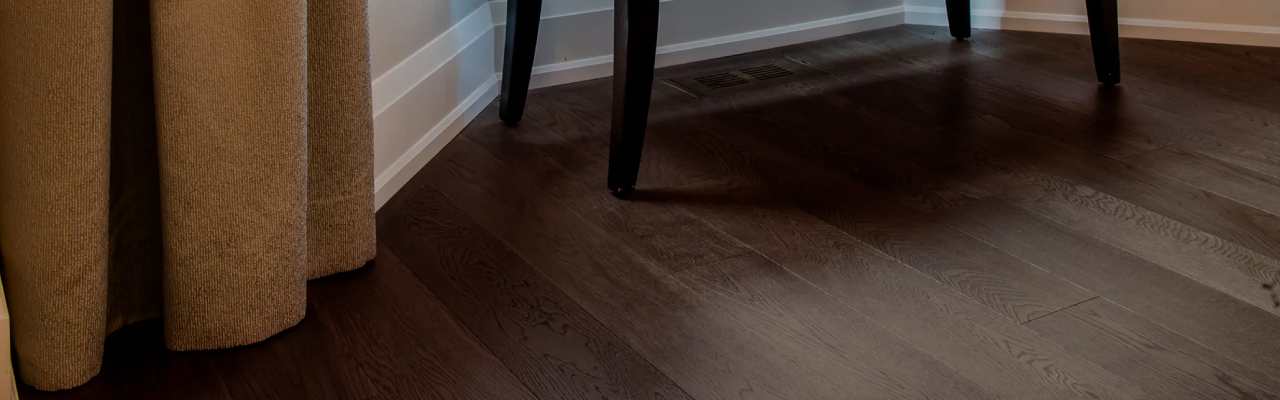
Luxury vinyl planks (LVP) have become a popular flooring choice due to their durability, affordability, and realistic appearance. Homeowners often seek to install LVP over existing hardwood floors for various reasons, including updating the look of their space, concealing imperfections, or simply adding an extra layer of protection. In this comprehensive guide, we’ll walk you through the process of Installing Luxury Vinyl Planks Over Hardwood 2024, covering everything from preparation and materials to installation techniques and maintenance considerations.
Why Install Luxury Vinyl Planks Over Hardwood?
Before delving into the installation process, let’s explore some of the reasons why homeowners might choose to install luxury vinyl planks over existing hardwood flooring:
- Aesthetic Appeal: Luxury vinyl planks offer a wide range of styles, colors, and textures that can enhance the aesthetic appeal of your space. By installing LVP over hardwood, you can achieve the look of hardwood flooring without the expense or maintenance requirements associated with natural wood.
- Conceal Imperfections: If your hardwood floors are showing signs of wear and tear, such as scratches, dents, or stains, installing LVP over them can help conceal these imperfections and give your floors a fresh, new appearance.
- Added Protection: Adding a layer of luxury vinyl planks over hardwood can provide an additional barrier against damage from foot traffic, furniture, and other sources of wear and tear. This can help prolong the life of your hardwood floors and protect your investment in your home.
- Cost-Effective Solution: Installing luxury vinyl planks over existing hardwood flooring is often more cost-effective than replacing the hardwood entirely. It eliminates the need for labor-intensive demolition and disposal of the old flooring, saving both time and money.
Preparation for Installation
Before installing luxury vinyl planks over hardwood flooring, it’s essential to properly prepare the existing surface to ensure a smooth and successful installation. Here are the steps involved in preparing for the installation process:
- Clean the Hardwood Floors: Thoroughly clean the hardwood floors to remove any dirt, dust, debris, or residues that may affect the adhesion of the luxury vinyl planks. Use a vacuum cleaner or broom followed by a damp mop with a mild cleaning solution to ensure the surface is free of contaminants.
- Inspect for Damage: Carefully inspect the hardwood floors for any signs of damage, such as warped or loose boards, protruding nails, or water damage. Make any necessary repairs or replacements to ensure the subfloor is in good condition and suitable for installation.
- Sand the Surface (If Needed): If the hardwood floors have a glossy finish or rough texture, it may be necessary to sand the surface lightly to create a smoother, more uniform substrate for the luxury vinyl planks. Use a floor sander with fine-grit sandpaper and follow manufacturer recommendations for sanding techniques.
- Level the Subfloor: Check the levelness of the hardwood subfloor using a straightedge or level. If there are any uneven areas or dips in the subfloor, use a self-leveling compound to fill in the gaps and create a level surface for the luxury vinyl planks.
- Allow for Expansion Gaps: Luxury vinyl planks require expansion gaps around the perimeter of the room to accommodate changes in temperature and humidity. Use spacers to maintain a consistent gap of at least 1/4 inch between the LVP and the walls, cabinets, or other fixed objects.
Materials and Tools Needed
Before starting the installation process, gather the following materials and tools:
- Luxury Vinyl Planks (LVP): Choose high-quality luxury vinyl planks that are specifically designed for floating installation over existing hardwood floors. Consider factors such as style, color, thickness, and wear layer thickness when selecting LVP for your project.
- Underlayment: Depending on the condition of the hardwood subfloor and the requirements of the LVP manufacturer, you may need to install an underlayment to provide additional cushioning, sound insulation, and moisture resistance. Choose an underlayment that is compatible with both hardwood and luxury vinyl flooring.
- Adhesive (Optional): In some cases, it may be necessary to use a pressure-sensitive adhesive to secure the luxury vinyl planks to the hardwood subfloor. Check the manufacturer’s recommendations and follow the adhesive application instructions carefully.
- Tapping Block and Rubber Mallet: Use a tapping block and rubber mallet to gently tap the edges and ends of the luxury vinyl planks into place during installation. This helps ensure a tight fit and prevents damage to the planks.
- Utility Knife: A sharp utility knife is essential for cutting the luxury vinyl planks to size, especially around corners, doorways, and obstacles. Choose a knife with a retractable blade for safety and precision.
- Tape Measure and Straightedge: Use a tape measure and straightedge to accurately measure and cut the luxury vinyl planks to fit the dimensions of the room. This helps minimize waste and ensure a professional-looking installation.
- Spacers: Spacers are used to maintain consistent expansion gaps around the perimeter of the room and between adjacent rows of luxury vinyl planks. Plastic or rubber spacers are commonly used for this purpose.
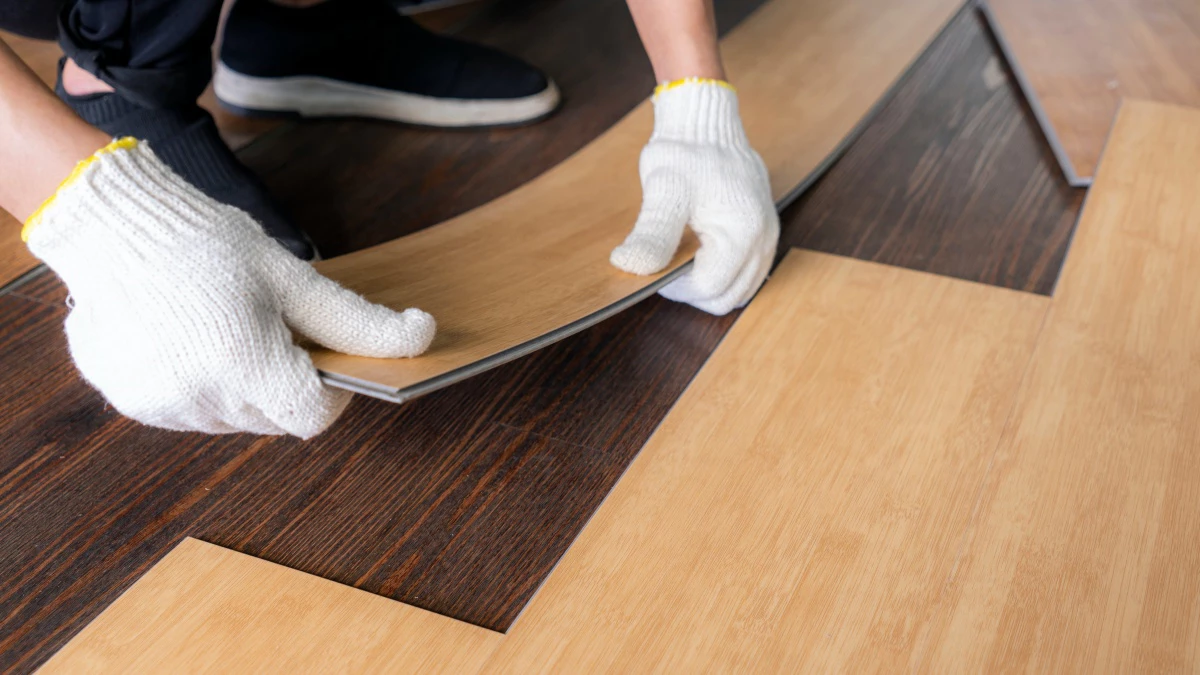
Installation Process
Now that you’ve prepared the hardwood subfloor and gathered the necessary materials and tools, you’re ready to begin the installation process. Follow these step-by-step instructions to install luxury vinyl planks over hardwood flooring:
- Acclimate the Luxury Vinyl Planks: Before installation, acclimate the luxury vinyl planks to the room environment for at least 48 hours. This allows the planks to adjust to the temperature and humidity conditions, minimizing the risk of expansion or contraction after installation.
- Install the Underlayment (If Needed): If you’re using an underlayment, roll it out over the hardwood subfloor according to the manufacturer’s instructions. Secure the underlayment in place using double-sided tape or adhesive, making sure to overlap seams and trim any excess material.
- Plan the Layout: Plan the layout of the luxury vinyl planks, taking into account factors such as room dimensions, doorways, and transitions to other flooring types. Start the installation from the longest wall in the room, working towards the opposite wall.
- Begin Installation: Starting in one corner of the room, lay the first row of luxury vinyl planks with the tongue side facing the wall and the grooved side facing outwards. Use spacers to maintain a consistent expansion gap along the walls.
- Install Subsequent Rows: Continue installing additional rows of luxury vinyl planks, connecting the tongue and groove edges tightly together using a slight angle and downward pressure. Use a tapping block and rubber mallet to ensure a snug fit and eliminate gaps between planks.
- Cut Planks to Fit: Use a utility knife and straightedge to measure and cut the last plank in each row to fit the remaining space along the wall. Remember to leave the required expansion gap and stagger end joints for a more visually appealing installation.
- Install Transition Pieces: As you approach doorways, closets, or other transitions, install transition pieces such as T-moldings, reducers, or threshold strips to create a smooth and seamless transition between different flooring surfaces.
- Finish Installation: Continue installing luxury vinyl planks row by row until the entire floor is covered. Trim any excess underlayment or spacers along the edges of the room. Once the installation is complete, remove the spacers and install baseboards or quarter-round molding to cover expansion gaps and provide a finished appearance.
- Clean and Inspect: After installation, clean the luxury vinyl floors with a damp mop or cloth to remove any dust, debris, or adhesive residue. Inspect the flooring carefully for any gaps, raised edges, or visible seams, and make any necessary adjustments or repairs as needed.
Maintenance and Care
Once your luxury vinyl planks are installed, it’s essential to maintain them properly to preserve their appearance and performance over time. Here are some maintenance tips to keep your LVP looking like new:
- Regular Cleaning: Sweep, vacuum, or dust mop the luxury vinyl floors regularly to remove dirt, dust, and debris that can scratch the surface or dull the finish. Use a damp mop with a mild cleaner or manufacturer-approved vinyl floor cleaner to clean spills, stains, and stubborn dirt effectively.
- Avoid Harsh Chemicals: Refrain from using abrasive cleaners, harsh chemicals, or steam mops on luxury vinyl floors, as they can damage the wear layer and diminish the floor’s appearance over time. Stick to gentle cleaning solutions and non-abrasive cleaning tools to preserve the integrity of the surface.
- Protect High-Traffic Areas: Place rugs or mats in high-traffic areas, such as entryways, hallways, and kitchen workstations, to protect the flooring from excessive wear and tear. Use felt pads or furniture glides under heavy furniture legs to prevent scratching or indentation of the luxury vinyl surface.
- Wipe Spills Promptly: Immediately wipe up spills, pet accidents, or standing water to prevent moisture from seeping into the seams or underlayment of the flooring. Use a clean, absorbent cloth or towel to blot the spill and dry the affected area thoroughly to prevent water damage.
- Use Floor Protectors: Place protective pads or coasters under furniture legs, appliances, and heavy objects to distribute weight evenly and prevent indentation or damage to the luxury vinyl floors. Avoid dragging or sliding furniture across the floor, as this can cause scratches or gouges.
- Maintain Humidity Levels: Maintain consistent indoor humidity levels within the recommended range (typically between 30% to 60%) to prevent excessive expansion or contraction of the luxury vinyl flooring. Use a humidifier or dehumidifier as needed to control humidity levels and minimize the risk of moisture-related issues.
Conclusion:
Installing Luxury Vinyl Planks Over Hardwood 2024 is a practical and cost-effective way to update the look of your space and enhance the durability of your floors. By following the steps outlined in this guide and taking proper care of your luxury vinyl floors, you can enjoy beautiful, low-maintenance flooring that stands the test of time. Whether you’re renovating your home or embarking on a DIY project, luxury vinyl planks offer endless possibilities for transforming your living spaces into the ultimate expression of style and comfort. Experience the beauty and versatility of luxury vinyl flooring today and elevate your home to new heights of sophistication and elegance.