
Installing Vinyl Plank Flooring: Comprehensive Step-by-Step Guide
Vinyl plank flooring has become a popular choice among homeowners for its durability, versatility, and ease of installation. Whether you’re looking to upgrade your home’s flooring or embark on a DIY project, Installing Vinyl Plank Flooring can transform the look and feel of any room. In this comprehensive guide, we’ll provide you with a detailed, step-by-step walkthrough of the installation process for vinyl plank flooring. From preparation and planning to cutting and laying the planks, you’ll learn everything you need to know to achieve professional-looking results.
Step 1: Gather Your Materials and Tools:
Before you begin installing vinyl plank flooring, it’s essential to gather all the necessary materials and tools:
- Vinyl plank flooring
- Underlayment (if required)
- Tape measure
- Utility knife
- Straight edge
- Pry bar
- Hammer
- Spacers
- Tapping block
- Rubber mallet
- Flooring adhesive (if using glue-down installation method)
- Broom and dustpan
- Vacuum cleaner
Ensure that you have enough flooring material to cover the entire area, accounting for any waste or cuts that may be necessary during the installation process.
Step 2: Prepare the Subfloor:
Proper subfloor preparation is crucial for a successful vinyl plank flooring installation. Follow these steps to prepare the subfloor:
- Remove any existing flooring material, such as carpet, hardwood, or tile.
- Inspect the subfloor for any damage, unevenness, or debris. Repair any cracks or imperfections and ensure that the subfloor is clean and smooth.
- If necessary, install a suitable underlayment to provide additional cushioning, moisture protection, and sound insulation. Follow the manufacturer’s instructions for installation.
Step 3: Acclimate the Flooring:
Before installation, allow the vinyl plank flooring to acclimate to the room’s temperature and humidity levels. Stack the flooring planks in the installation area and leave them for at least 48 hours to adjust to the environment. This will help prevent the expansion or contraction of the planks after installation.
Step 4: Plan the Layout:
Careful planning of the layout is essential to ensure a professional-looking installation. Follow these guidelines when planning the layout:
- Determine the direction in which you want the planks to run. It’s best to install the planks parallel to the longest wall for most rooms.
- Measure the length and width of the room and calculate the total square footage to determine how many boxes of flooring you’ll need.
- Use chalk lines or a straight edge to mark guidelines on the subfloor, indicating where the first row of planks will be placed.
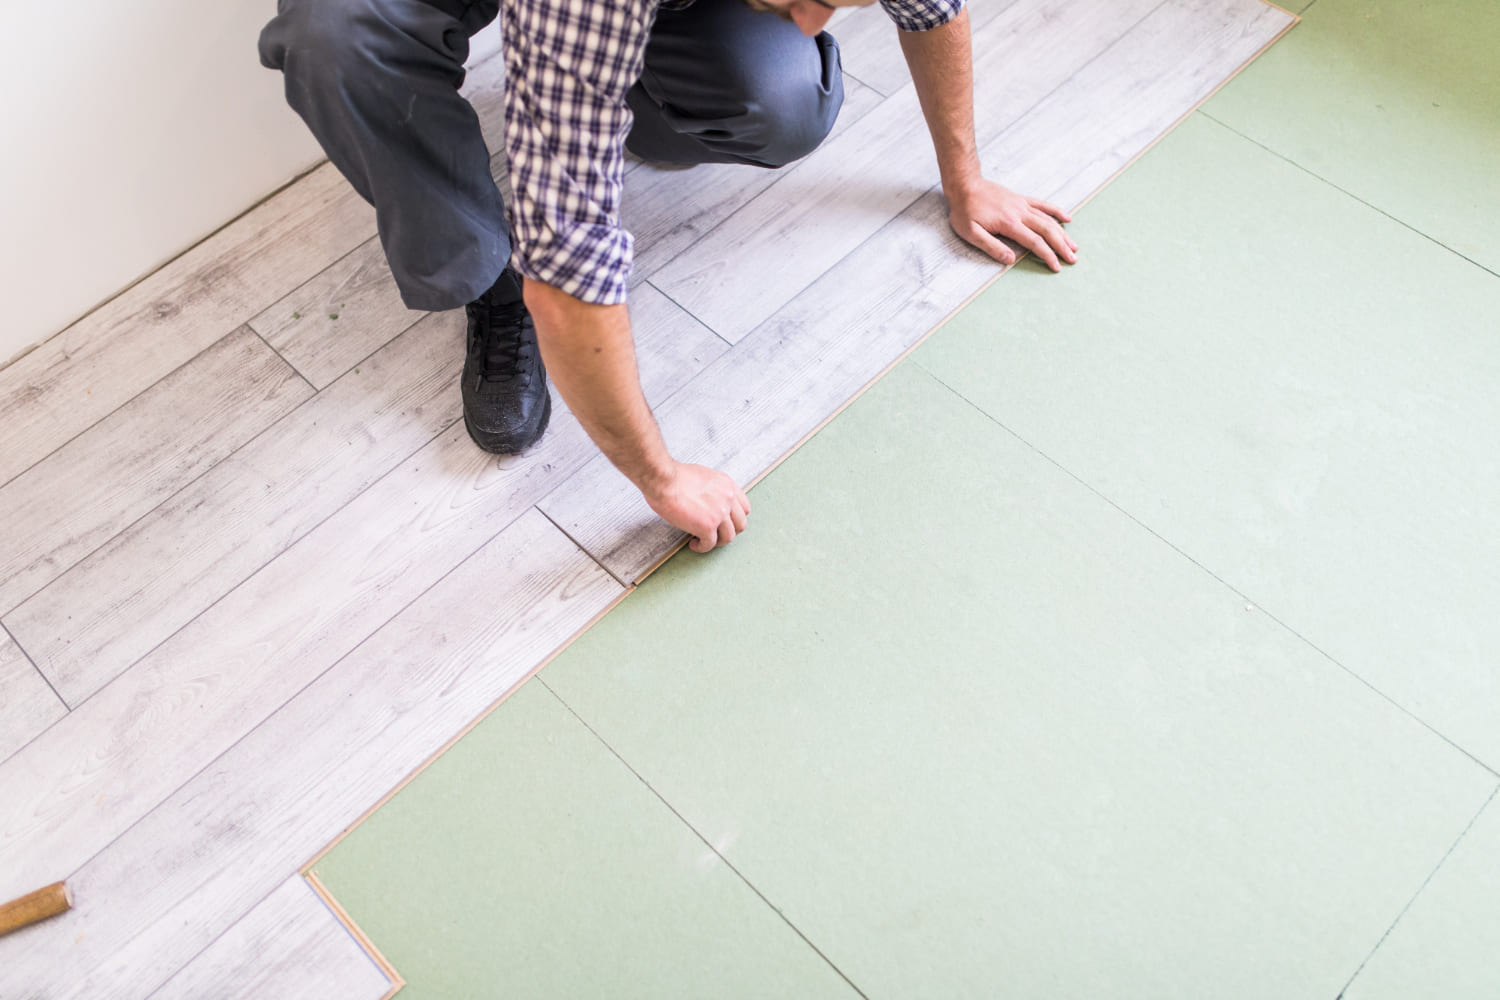
Step 5: Install the First Row:
Once you’ve planned the layout, it’s time to start installing the first row of vinyl plank flooring:
- Begin in the corner of the room, aligning the edge of the first plank with the guideline marked on the subfloor.
- Insert shims or spacers along the edge of the plank to maintain a small expansion gap between the flooring and the wall.
- Continue installing the first row of planks, ensuring that each plank is tightly locked together using the click-lock mechanism.
Step 6: Install Subsequent Rows:
After completing the first row, follow these steps to install the subsequent rows of vinyl plank flooring:
- Start the second row with a partial plank, ensuring that the end joints are staggered for a more natural appearance.
- Insert shims or spacers along the edge of the second row to maintain the expansion gap.
- Continue installing subsequent rows of planks, locking each plank together and ensuring that the end joints are staggered.
Step 7: Cut Planks to Fit:
As you reach the end of each row or encounter obstacles such as doorways or corners, you’ll need to cut planks to fit:
- Measure the remaining space between the last plank and the wall, accounting for the expansion gap.
- Use a tape measure and a straight edge to mark the cutting line on the plank.
- Use a utility knife or a jigsaw to carefully cut the plank along the marked line.
- Install the cut plank, ensuring it fits snugly against the wall and maintains the expansion gap.
Step 8: Install Transition Strips and Trim:
Once all the planks are installed, you may need to install transition strips or trim pieces to cover gaps between different flooring materials or to provide a finished look:
- Measure the length of the transition area and cut the transition strip or trim piece to size.
- Install the transition strip or trim piece using appropriate adhesive or fasteners, following the manufacturer’s instructions.
Step 9: Inspect and Clean the Flooring:
After completing the installation, thoroughly inspect the vinyl plank flooring for any visible defects, gaps, or imperfections. Use a broom and dustpan to sweep away any debris or dust, and then vacuum the entire floor to ensure it’s clean and free of particles.
Step 10: Enjoy Your New Flooring:
Congratulations! You’ve successfully installed vinyl plank flooring in your home. Now it’s time to sit back, relax, and enjoy your beautiful new floors. Whether you’re admiring the sleek, modern look of the planks or reveling in the durability and ease of maintenance, your vinyl plank flooring is sure to enhance the overall aesthetic and functionality of your living space.
Conclusion: Installing Vinyl Plank Flooring: Comprehensive Step-by-Step Guide
Installing vinyl plank flooring is a rewarding DIY project that can transform the look and feel of any room in your home. By following this comprehensive step-by-step guide, you can achieve professional-looking results while saving time and money on installation costs. From preparing the subfloor to cutting and laying the planks, each step is essential for ensuring a successful and long-lasting installation. With proper planning, attention to detail, and the right tools and materials, you can enjoy beautiful, durable vinyl plank flooring that enhances the beauty and functionality of your home for years to come.