

How to install vinyl wood planks on a stair?
Vinyl wood plank flooring has gained popularity in recent years due to its durability, affordability, and aesthetic appeal. Installing vinyl wood planks on stairs can elevate the look of your home while providing a durable and easy-to-maintain surface. In this comprehensive guide, we will walk you through the step-by-step process of installing vinyl wood planks on stairs, ensuring a professional-looking finish that will enhance the beauty of your staircase.
Preparation
Before beginning the installation process, it’s essential to gather the necessary materials and tools:
Materials:
- Vinyl wood plank flooring
- Adhesive or double-sided tape
- Stair nosing
- Underlayment (if needed)
- Transition strips (if necessary)
- T-molding (if necessary)
Tools:
- Measuring tape
- Utility knife
- Hammer
- Pry bar
- Carpenter’s square
- Safety goggles
- Knee pads
- Vacuum cleaner
Once you have all the materials and tools ready, you can proceed with the preparation steps:
- Measure the stairs: Use a measuring tape to determine the dimensions of each stair tread and riser. Record these measurements accurately to ensure that you cut the vinyl planks to the correct size later in the process.
- Clean the stairs: Thoroughly clean the stairs to remove any dust, dirt, or debris. A vacuum cleaner can be useful for this step, ensuring a clean and smooth surface for the vinyl plank installation.
- Remove existing flooring (if applicable): If there is existing carpet, hardwood, or laminate flooring on the stairs, use a pry bar and hammer to carefully remove it. Make sure to remove any adhesive residue or nails from the stairs, as these can affect the installation of the vinyl planks.
Installing Vinyl Wood Planks
Now that the stairs are prepared, you can start installing the vinyl wood planks. Follow these steps for a successful installation:
- Cut the vinyl planks: Using a utility knife and carpenter’s square, measure and cut the vinyl planks to fit the dimensions of each stair tread and riser. It’s essential to cut the planks precisely to ensure a snug fit and professional finish.
- Apply adhesive or double-sided tape: Depending on the type of vinyl planks you’re using, you may need to apply adhesive or double-sided tape to the back of each plank before installing it on the stairs. Follow the manufacturer’s instructions for the appropriate adhesive application method.
- Install the stair nosing: For added safety and aesthetics, install stair nosing on each stair tread. Stair nosing provides a finished edge and helps prevent slips and falls. Secure the stair nosing using adhesive or screws, following the manufacturer’s guidelines.
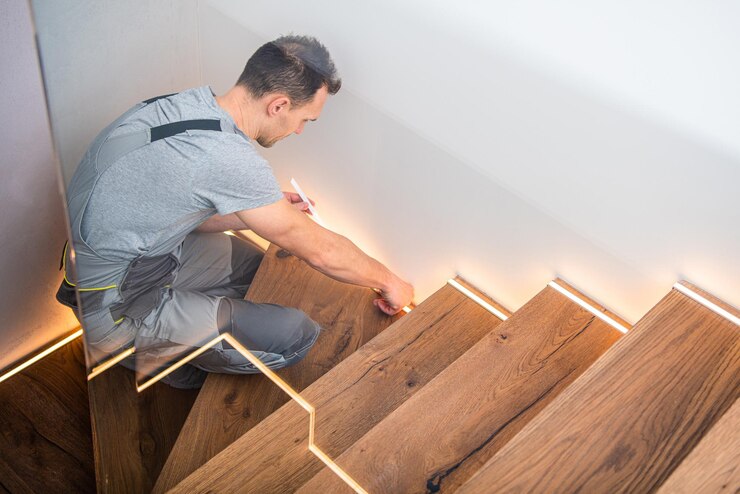
- Begin installation: Starting from the bottom of the staircase, place the first vinyl plank on the stair tread, ensuring that it fits snugly against the stair nosing. Press down firmly to secure the plank in place.
- Continue installing planks: Working your way up the staircase, continue installing vinyl planks on each stair tread, ensuring a tight fit between each plank. Use a hammer or rubber mallet to gently tap the planks into place, if necessary.
- Cut planks as needed: As you approach the top of the staircase or encounter obstacles such as handrails or newel posts, you may need to cut the vinyl planks to fit. Use a utility knife and carpenter’s square to make precise cuts, ensuring a seamless installation.
- Install transition strips (if necessary): If transitioning from vinyl wood planks to another type of flooring at the top of the staircase, install transition strips to create a smooth and professional transition between the two surfaces.
- Double-check the installation: Once all the vinyl planks are installed, double-check the entire staircase to ensure that each plank is securely in place and that there are no gaps or inconsistencies in the installation.
Finishing Touches and Maintenance
With the vinyl wood planks installed on the stairs, you can now add the finishing touches and ensure proper maintenance for long-lasting results:
- Trim excess material: Trim any excess material from the stair nosing or vinyl planks using a utility knife or trim saw, ensuring a clean and polished appearance.
- Clean the stairs: After installation, clean the stairs once again to remove any dust or debris that may have accumulated during the installation process. A vacuum cleaner or damp cloth can be used for this purpose.
- Maintain the vinyl flooring: To keep your vinyl wood plank stairs looking their best, regularly sweep or vacuum the surface to remove dirt and debris. You can also mop the stairs with a mild detergent solution as needed, being careful not to use excessive water, which can damage the flooring.
- Address any damage promptly: If you notice any scratches, dents, or other damage to the vinyl planks, address them promptly to prevent further deterioration. Depending on the severity of the damage, you may need to replace individual planks or apply a repair kit recommended by the manufacturer.
Conclusion
Installing vinyl wood planks on stairs is a rewarding DIY project that can enhance the beauty and functionality of your home. By following the steps outlined in this guide and paying attention to detail, you can achieve a professional-looking finish that will impress guests and provide years of enjoyment. With proper care and maintenance, your vinyl wood plank stairs will continue to look beautiful for years to come.